Haier Y102 Stock Firmware, Stock ROM Download

Haier Android Stock ROM Firmware Flash File
This Haier Y102 Firmware, Stock ROM file can be used with any service tools capable of Flashing Stock ROM file on Haier Android devices.
Stock firmware are mostly needed to either upgrade your Haier Y102, downgrade it or, to simply flash the phone to correct certain software issues or malfunctions on the phone. Here on this page I have contained the download link for the complete Haier Y102, Stock ROM file which can be used to flash factory OS back to your Haier Y102.

How to Download Stock Firmware and Flash Haier Y102 with the Stock ROM

1. Download SP Flash Tool from here and install it on your PC. If you don't have MTK Android drivers installed on your PC yet, you must install it too. Download VCOM Drivers here

2. Download your Haier Y102 firmware, Stock ROM File from here.

3. Open the SP Flash Tool you downloaded from the link above. It is compressed in a zip file, simply extract it onto a folder on your PC, open the folder to locate flash_tool.exe application and then; double-click it to lunch the program.

4. Go to the folder where you downloaded the Haier Y102 Stock ROM and open it. It is compressed in a ZIP File, simply decompress/unzip it onto a folder on your PC.

5. On SP Flash Tool, select Scatter Loading. A window should open. Using the browse button, navigate to the folder where you unzipped the Haier Y102 stock ROM and then select "MTXXXX-ANDROID-SCATTER", from there. Remember: "xxxx" refers to the MTK version of your phone.

6. Once selected, SP Flash Tool will load all the partitions in the Haier Y102 stock ROM you downloaded. From the list, mark all the partitions EXCEPT these three (3): Preloader, UserData and CACHE.

7. Now, select Download on SP Flash Tool.

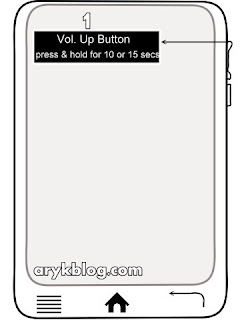
8. Put off your Haier Y102 or remove battery from it and re-insert the battery again. Connect your Haier Y102 Mobile Phone to the PC and then tap the Power button once.

9. For few seconds, your Windows PC will install the necessary drivers for the flashing operation and then, the flashing operation will commence promptly.

10. When the flashing operation completes, SP Flash Tool will display a green PASS circle. You may then disconnect your phone from the PC.
CONGRATULATIONS! You have successfully flashed your Haier Y102 to its factory defaults.
NOTE: if you encounter any errors while flashing your Haier Y102 using SP Flash Tools, see here: Solutions to All SP Flash Tools Errors: Practical Guides

For Graphical Illustrations on how to flash Haier android devices, see here: How to Flash Haier Android Device: Step by Step with Pictures

Also Read:

Video Tutorial: How to Flash All MTK Android Devices Including Haier Y102


How to Hard Reset iTel 1505 (it1505)

Most iTel androids give nightmare when trying to put them in recovery mode making hard-resetting or formatting most iTel android devices difficult.


Because iTel androids are SpreadTRUM androids, they have slightly different methods compare to other android devices like HTC, Sansung, Tecno amongst others which have specific key combo for booting into recovery mode from which you can perform a hard reset, factory reset, wipe user data or clean format the iTel android, itel it1505 to be specific.


But the truth is, iTel android also have specific key combo for booting into recovery mode which is mostly needed whenever we need to factory reset or hard reset the phone.
Here, I would discuss how to put your iTel 1505 android device in recovery mode for factory reset, soft format or for enabling USB Debugging on the iTel android phone even when the pattern is locked or password restricted.


How to Boot iTel 1505 to Recovery Mode and Hard Reset or Wipe

1. Power Off your iTel 1505: either by removing the battery from the phone or by powering it off normally, the first thing you need to do is just power off the phone.


2. Press And Hold the Power Button for about 3 Seconds.


iTel 1505 Hard Reset -Step 2

NOTE: Some iTel androids such as the iTel it1502 volume button should be pressed for up to 15 seconds at this stage.

3. While Still Holding the Power Button, press and hold Volume Down (Volume -) Buttion for about 3 Seconds.


iTel 1505 Hard Reset -Step 3

I.E Now, you should be pressing both Volume Down + Power Buttons together.


4. Now, release both buttons i.e Power Button and Volume Down button at once.


iTel 1505 Hard Reset -Step 4

5. Shortly after releasing both buttons, an android icon shhould appear on your iTel 1505 screen. Now, press the Volume Up (Volume +) button.
Pronto! Your iTel 1505 should now boot into recovery mode.


iTel 1505 Hard Reset -Step 5

NOTE:

1. Use the Volume-up to navigate up.

2. Use the Volume-down to navigate down.

3. The Power button to select.

4. This methods have only been used for iTel it1505.

5. I believe the same method should work with all iTel android devices thus; for booting all of them to recovery mode.


How to Enable USB Debugging Mode In iTel Android While Screen is Locked

1. Follow the instructions detailed in the first section above on how to boot iTel it1505 to recovery mode and hard reset.


2. When you get to the stage 4 discussed above, swipe or pull your iTel it1505 screen from the top.


3. Navigate to Settings and tap it.


4. Scroll down until you see Developer Option and tap it.

5. If Developer Option is not there, go to About phone >> Build Number. Tap the Build Number repeatedly for up to 7 - 9 times. Or, until it says, "You are now a developer"


If you prefer to put your iTel android in USB Debugging mode while the screen is locked or password protected, the simple steps explained above is your safest and best guess.

Download Haier Zio X5 Stock ROM Firmware (Flash File)

Haier Android Stock ROM Firmware Flash File

If you notice any software malfunctions with your Haier Zio X5 android device, you're most likely required to download and flash stock ROM firmware on your Zio X5 to permanently correct the software errors you noticed on your Haier Zio X5. And when you load stock firmware on your Haier Zio X5 using any Qualcomm flash tool, your Haier Zio X5 will be reset to factory defaults settings and by that, definately, your UserData will be lost including contacts, messages and others.


If your device has been bricked and want to unbrick it, you will need to pay closer attention to the tutorials contained below here.


Haier Zio X5 Stock ROM Firmware Download Link(s)

1. Haier Zio X5_H01_A2_S003_VN (Android 4.3) Stock Firmware Download Link


How to Flash Stock Firmware On Haier Zio X5

1. Download your Haier Zio X5 stock ROM firmware from the link above.


2. Extract the Haier Zio X5 Firmware you downloaded from the link above onto a folder on your PC.


3. Download and install Qualcomm android device drivers on your PC. You may skip this step if you have installed Qualcomm drivers on your PC already otherwise, download Qualcomm drivers here


4. Now, choose either of the tools listed below here to load the stock firmware on your Haier Zio X5.


Note

1. Each of the tools listed above contained step by step guides with illustrated pictures on how to flash stock firmware on your Haier Zio X5.

2. If your device is bricked already, I recommend that you use Tool Studio eMMC Download Tool or QPST QFIL.

3. If you require any further assistance, simply drop your comment detailing the issue(s) and I shall help you revive your Haier Zio X5, if need be.

How to Hard Reset iTel 1452 (it1452)

Most iTel androids give nightmare when trying to put them in recovery mode making hard-resetting or formatting most iTel android devices difficult.


Because iTel androids are SpreadTRUM androids, they have slightly different methods compare to other android devices like HTC, Sansung, Tecno amongst others which have specific key combo for booting into recovery mode from which you can perform a hard reset, factory reset, wipe user data or clean format the iTel android, itel it1452 to be specific.


But the truth is, iTel android also have specific key combo for booting into recovery mode which is mostly needed whenever we need to factory reset or hard reset the phone.
Here, I would discuss how to put your iTel 1452 android device in recovery mode for factory reset, soft format or for enabling USB Debugging on the iTel android phone even when the pattern is locked or password restricted.


How to Boot iTel 1452 to Recovery Mode and Hard Reset or Wipe

1. Power Off your iTel 1452: either by removing the battery from the phone or by powering it off normally, the first thing you need to do is just power off the phone.


2. Press And Hold the Power Button for about 3 Seconds.


iTel 1452 Hard Reset -Step 2

NOTE: Some iTel androids such as the iTel it1502 volume button should be pressed for up to 15 seconds at this stage.

3. While Still Holding the Power Button, press and hold Volume Down (Volume -) Buttion for about 3 Seconds.


iTel 1452 Hard Reset -Step 3

I.E Now, you should be pressing both Volume Down + Power Buttons together.


4. Now, release both buttons i.e Power Button and Volume Down button at once.


iTel 1452 Hard Reset -Step 4

5. Shortly after releasing both buttons, an android icon shhould appear on your iTel 1452 screen. Now, press the Volume Up (Volume +) button.
Pronto! Your iTel 1452 should now boot into recovery mode.


iTel 1452 Hard Reset -Step 5

NOTE:

1. Use the Volume-up to navigate up.

2. Use the Volume-down to navigate down.

3. The Power button to select.

4. This methods have only been used for iTel it1452.

5. I believe the same method should work with all iTel android devices thus; for booting all of them to recovery mode.


How to Enable USB Debugging Mode In iTel Android While Screen is Locked

1. Follow the instructions detailed in the first section above on how to boot iTel it1452 to recovery mode and hard reset.


2. When you get to the stage 4 discussed above, swipe or pull your iTel it1452 screen from the top.


3. Navigate to Settings and tap it.


4. Scroll down until you see Developer Option and tap it.

5. If Developer Option is not there, go to About phone >> Build Number. Tap the Build Number repeatedly for up to 7 - 9 times. Or, until it says, "You are now a developer"


If you prefer to put your iTel android in USB Debugging mode while the screen is locked or password protected, the simple steps explained above is your safest and best guess.

Haier HM-N501-FL Stock Firmware, Stock ROM Download

Haier Android Stock ROM Firmware Flash File
This Haier HM-N501-FL_20151106_225707 Firmware, Stock ROM file can be used with any service tools capable of Flashing Stock ROM file on Haier Android devices.
Stock firmware are mostly needed to either upgrade your Haier HM-N501-FL, downgrade it or, to simply flash the phone to correct certain software issues or malfunctions on the phone. Here on this page I have contained the download link for the complete Haier HM-N501-FL, Stock ROM file which can be used to flash factory OS back to your Haier HM-N501-FL.

How to Download Stock Firmware and Flash Haier HM-N501-FL with the Stock ROM

1. Download SP Flash Tool from here and install it on your PC. If you don't have MTK Android drivers installed on your PC yet, you must install it too. Download VCOM Drivers here

2. Download your Haier HM-N501-FL firmware, Stock ROM File from here.

3. Open the SP Flash Tool you downloaded from the link above. It is compressed in a zip file, simply extract it onto a folder on your PC, open the folder to locate flash_tool.exe application and then; double-click it to lunch the program.

4. Go to the folder where you downloaded the Haier HM-N501-FL Stock ROM and open it. It is compressed in a ZIP File, simply decompress/unzip it onto a folder on your PC.

5. On SP Flash Tool, select Scatter Loading. A window should open. Using the browse button, navigate to the folder where you unzipped the Haier HM-N501-FL stock ROM and then select "MTXXXX-ANDROID-SCATTER", from there. Remember: "xxxx" refers to the MTK version of your phone.

6. Once selected, SP Flash Tool will load all the partitions in the Haier HM-N501-FL stock ROM you downloaded. From the list, mark all the partitions EXCEPT these three (3): Preloader, UserData and CACHE.

7. Now, select Download on SP Flash Tool.

8. Put off your Haier HM-N501-FL or remove battery from it and re-insert the battery again. Connect your Haier HM-N501-FL Mobile Phone to the PC and then tap the Power button once.

9. For few seconds, your Windows PC will install the necessary drivers for the flashing operation and then, the flashing operation will commence promptly.

10. When the flashing operation completes, SP Flash Tool will display a green PASS circle. You may then disconnect your phone from the PC.
CONGRATULATIONS! You have successfully flashed your Haier HM-N501-FL to its factory defaults.
NOTE: if you encounter any errors while flashing your Haier HM-N501-FL using SP Flash Tools, see here: Solutions to All SP Flash Tools Errors: Practical Guides

For Graphical Illustrations on how to flash Haier android devices, see here: How to Flash Haier Android Device: Step by Step with Pictures

Also Read:

Video Tutorial: How to Flash All MTK Android Devices Including Haier HM-N501-FL


How to Hard Reset iTel 1408 (it1408)

Most iTel androids give nightmare when trying to put them in recovery mode making hard-resetting or formatting most iTel android devices difficult.


Because iTel androids are SpreadTRUM androids, they have slightly different methods compare to other android devices like HTC, Sansung, Tecno amongst others which have specific key combo for booting into recovery mode from which you can perform a hard reset, factory reset, wipe user data or clean format the iTel android, itel it1408 to be specific.


But the truth is, iTel android also have specific key combo for booting into recovery mode which is mostly needed whenever we need to factory reset or hard reset the phone.
Here, I would discuss how to put your iTel 1408 android device in recovery mode for factory reset, soft format or for enabling USB Debugging on the iTel android phone even when the pattern is locked or password restricted.


How to Boot iTel 1408 to Recovery Mode and Hard Reset or Wipe

1. Power Off your iTel 1408: either by removing the battery from the phone or by powering it off normally, the first thing you need to do is just power off the phone.


2. Press And Hold the Power Button for about 3 Seconds.


iTel 1408 Hard Reset -Step 2

NOTE: Some iTel androids such as the iTel it1502 volume button should be pressed for up to 15 seconds at this stage.

3. While Still Holding the Power Button, press and hold Volume Down (Volume -) Buttion for about 3 Seconds.


iTel 1408 Hard Reset -Step 3

I.E Now, you should be pressing both Volume Down + Power Buttons together.


4. Now, release both buttons i.e Power Button and Volume Down button at once.


iTel 1408 Hard Reset -Step 4

5. Shortly after releasing both buttons, an android icon shhould appear on your iTel 1408 screen. Now, press the Volume Up (Volume +) button.
Pronto! Your iTel 1408 should now boot into recovery mode.


iTel 1408 Hard Reset -Step 5

NOTE:

1. Use the Volume-up to navigate up.

2. Use the Volume-down to navigate down.

3. The Power button to select.

4. This methods have only been used for iTel it1408.

5. I believe the same method should work with all iTel android devices thus; for booting all of them to recovery mode.


How to Enable USB Debugging Mode In iTel Android While Screen is Locked

1. Follow the instructions detailed in the first section above on how to boot iTel it1408 to recovery mode and hard reset.


2. When you get to the stage 4 discussed above, swipe or pull your iTel it1408 screen from the top.


3. Navigate to Settings and tap it.


4. Scroll down until you see Developer Option and tap it.

5. If Developer Option is not there, go to About phone >> Build Number. Tap the Build Number repeatedly for up to 7 - 9 times. Or, until it says, "You are now a developer"


If you prefer to put your iTel android in USB Debugging mode while the screen is locked or password protected, the simple steps explained above is your safest and best guess.

Download Haier 6180W Stock ROM Firmware (Flash File)

Haier Android Stock ROM Firmware Flash File

If you notice any software malfunctions with your Haier 6180W android device, you're most likely required to download and flash stock ROM firmware on your 6180W to permanently correct the software errors you noticed on your Haier 6180W. And when you load stock firmware on your Haier 6180W using any Qualcomm flash tool, your Haier 6180W will be reset to factory defaults settings and by that, definately, your UserData will be lost including contacts, messages and others.


If your device has been bricked and want to unbrick it, you will need to pay closer attention to the tutorials contained below here.


Haier 6180W Stock ROM Firmware Download Link(s)

1. Haier 6180W_H02_S04 (Android 4.4) Stock Firmware Download Link

2. Haier 6180W_RU_S05_2014 (Android 4.4) Stock Firmware Download Link


How to Flash Stock Firmware On Haier 6180W

1. Download your Haier 6180W stock ROM firmware from the link above.


2. Extract the Haier 6180W Firmware you downloaded from the link above onto a folder on your PC.


3. Download and install Qualcomm android device drivers on your PC. You may skip this step if you have installed Qualcomm drivers on your PC already otherwise, download Qualcomm drivers here


4. Now, choose either of the tools listed below here to load the stock firmware on your Haier 6180W.


Note

1. Each of the tools listed above contained step by step guides with illustrated pictures on how to flash stock firmware on your Haier 6180W.

2. If your device is bricked already, I recommend that you use Tool Studio eMMC Download Tool or QPST QFIL.

3. If you require any further assistance, simply drop your comment detailing the issue(s) and I shall help you revive your Haier 6180W, if need be.

How to Hard Reset iTel 1407 (it1407)

Most iTel androids give nightmare when trying to put them in recovery mode making hard-resetting or formatting most iTel android devices difficult.


Because iTel androids are SpreadTRUM androids, they have slightly different methods compare to other android devices like HTC, Sansung, Tecno amongst others which have specific key combo for booting into recovery mode from which you can perform a hard reset, factory reset, wipe user data or clean format the iTel android, itel it1407 to be specific.


But the truth is, iTel android also have specific key combo for booting into recovery mode which is mostly needed whenever we need to factory reset or hard reset the phone.
Here, I would discuss how to put your iTel 1407 android device in recovery mode for factory reset, soft format or for enabling USB Debugging on the iTel android phone even when the pattern is locked or password restricted.


How to Boot iTel 1407 to Recovery Mode and Hard Reset or Wipe

1. Power Off your iTel 1407: either by removing the battery from the phone or by powering it off normally, the first thing you need to do is just power off the phone.


2. Press And Hold the Power Button for about 3 Seconds.


iTel 1407 Hard Reset -Step 2

NOTE: Some iTel androids such as the iTel it1502 volume button should be pressed for up to 15 seconds at this stage.

3. While Still Holding the Power Button, press and hold Volume Down (Volume -) Buttion for about 3 Seconds.


iTel 1407 Hard Reset -Step 3

I.E Now, you should be pressing both Volume Down + Power Buttons together.


4. Now, release both buttons i.e Power Button and Volume Down button at once.


iTel 1407 Hard Reset -Step 4

5. Shortly after releasing both buttons, an android icon shhould appear on your iTel 1407 screen. Now, press the Volume Up (Volume +) button.
Pronto! Your iTel 1407 should now boot into recovery mode.


iTel 1407 Hard Reset -Step 5

NOTE:

1. Use the Volume-up to navigate up.

2. Use the Volume-down to navigate down.

3. The Power button to select.

4. This methods have only been used for iTel it1407.

5. I believe the same method should work with all iTel android devices thus; for booting all of them to recovery mode.


How to Enable USB Debugging Mode In iTel Android While Screen is Locked

1. Follow the instructions detailed in the first section above on how to boot iTel it1407 to recovery mode and hard reset.


2. When you get to the stage 4 discussed above, swipe or pull your iTel it1407 screen from the top.


3. Navigate to Settings and tap it.


4. Scroll down until you see Developer Option and tap it.

5. If Developer Option is not there, go to About phone >> Build Number. Tap the Build Number repeatedly for up to 7 - 9 times. Or, until it says, "You are now a developer"


If you prefer to put your iTel android in USB Debugging mode while the screen is locked or password protected, the simple steps explained above is your safest and best guess.

Download Haier E621 Stock ROM Firmware (Flash File)

Haier Android Stock ROM Firmware Flash File

If you notice any software malfunctions with your Haier E621 android device, you're most likely required to download and flash stock ROM firmware on your E621 to permanently correct the software errors you noticed on your Haier E621. And when you load stock firmware on your Haier E621 using any Qualcomm flash tool, your Haier E621 will be reset to factory defaults settings and by that, definately, your UserData will be lost including contacts, messages and others.


If your device has been bricked and want to unbrick it, you will need to pay closer attention to the tutorials contained below here.


Haier E621 Stock ROM Firmware Download Link(s)

1. Haier E621_V3_03 (Android 4.3) Stock Firmware Download Link


How to Flash Stock Firmware On Haier E621

1. Download your Haier E621 stock ROM firmware from the link above.


2. Extract the Haier E621 Firmware you downloaded from the link above onto a folder on your PC.


3. Download and install Qualcomm android device drivers on your PC. You may skip this step if you have installed Qualcomm drivers on your PC already otherwise, download Qualcomm drivers here


4. Now, choose either of the tools listed below here to load the stock firmware on your Haier E621.


Note

1. Each of the tools listed above contained step by step guides with illustrated pictures on how to flash stock firmware on your Haier E621.

2. If your device is bricked already, I recommend that you use Tool Studio eMMC Download Tool or QPST QFIL.

3. If you require any further assistance, simply drop your comment detailing the issue(s) and I shall help you revive your Haier E621, if need be.

How to Hard Reset iTel 1355 (it1355)

Most iTel androids give nightmare when trying to put them in recovery mode making hard-resetting or formatting most iTel android devices difficult.


Because iTel androids are SpreadTRUM androids, they have slightly different methods compare to other android devices like HTC, Sansung, Tecno amongst others which have specific key combo for booting into recovery mode from which you can perform a hard reset, factory reset, wipe user data or clean format the iTel android, itel it1355 to be specific.


But the truth is, iTel android also have specific key combo for booting into recovery mode which is mostly needed whenever we need to factory reset or hard reset the phone.
Here, I would discuss how to put your iTel 1355 android device in recovery mode for factory reset, soft format or for enabling USB Debugging on the iTel android phone even when the pattern is locked or password restricted.


How to Boot iTel 1355 to Recovery Mode and Hard Reset or Wipe

1. Power Off your iTel 1355: either by removing the battery from the phone or by powering it off normally, the first thing you need to do is just power off the phone.


2. Press And Hold the Power Button for about 3 Seconds.


iTel 1355 Hard Reset -Step 2

NOTE: Some iTel androids such as the iTel it1502 volume button should be pressed for up to 15 seconds at this stage.

3. While Still Holding the Power Button, press and hold Volume Down (Volume -) Buttion for about 3 Seconds.


iTel 1355 Hard Reset -Step 3

I.E Now, you should be pressing both Volume Down + Power Buttons together.


4. Now, release both buttons i.e Power Button and Volume Down button at once.


iTel 1355 Hard Reset -Step 4

5. Shortly after releasing both buttons, an android icon shhould appear on your iTel 1355 screen. Now, press the Volume Up (Volume +) button.
Pronto! Your iTel 1355 should now boot into recovery mode.


iTel 1355 Hard Reset -Step 5

NOTE:

1. Use the Volume-up to navigate up.

2. Use the Volume-down to navigate down.

3. The Power button to select.

4. This methods have only been used for iTel it1355.

5. I believe the same method should work with all iTel android devices thus; for booting all of them to recovery mode.


How to Enable USB Debugging Mode In iTel Android While Screen is Locked

1. Follow the instructions detailed in the first section above on how to boot iTel it1355 to recovery mode and hard reset.


2. When you get to the stage 4 discussed above, swipe or pull your iTel it1355 screen from the top.


3. Navigate to Settings and tap it.


4. Scroll down until you see Developer Option and tap it.

5. If Developer Option is not there, go to About phone >> Build Number. Tap the Build Number repeatedly for up to 7 - 9 times. Or, until it says, "You are now a developer"


If you prefer to put your iTel android in USB Debugging mode while the screen is locked or password protected, the simple steps explained above is your safest and best guess.

Haier 6190W Stock Firmware, Stock ROM Download

Haier Android Stock ROM Firmware Flash File
This Haier 6190W Firmware, Stock ROM file can be used with any service tools capable of Flashing Stock ROM file on Haier Android devices.
Stock firmware are mostly needed to either upgrade your Haier 6190W, downgrade it or, to simply flash the phone to correct certain software issues or malfunctions on the phone. Here on this page I have contained the download link for the complete Haier 6190W, Stock ROM file which can be used to flash factory OS back to your Haier 6190W.

How to Download Stock Firmware and Flash Haier 6190W with the Stock ROM

1. Download SP Flash Tool from here and install it on your PC. If you don't have MTK Android drivers installed on your PC yet, you must install it too. Download VCOM Drivers here

2. Download your Haier 6190W firmware, Stock ROM File from here.

3. Open the SP Flash Tool you downloaded from the link above. It is compressed in a zip file, simply extract it onto a folder on your PC, open the folder to locate flash_tool.exe application and then; double-click it to lunch the program.

4. Go to the folder where you downloaded the Haier 6190W Stock ROM and open it. It is compressed in a ZIP File, simply decompress/unzip it onto a folder on your PC.

5. On SP Flash Tool, select Scatter Loading. A window should open. Using the browse button, navigate to the folder where you unzipped the Haier 6190W stock ROM and then select "MTXXXX-ANDROID-SCATTER", from there. Remember: "xxxx" refers to the MTK version of your phone.

6. Once selected, SP Flash Tool will load all the partitions in the Haier 6190W stock ROM you downloaded. From the list, mark all the partitions EXCEPT these three (3): Preloader, UserData and CACHE.

7. Now, select Download on SP Flash Tool.

8. Put off your Haier 6190W or remove battery from it and re-insert the battery again. Connect your Haier 6190W Mobile Phone to the PC and then tap the Power button once.

9. For few seconds, your Windows PC will install the necessary drivers for the flashing operation and then, the flashing operation will commence promptly.

10. When the flashing operation completes, SP Flash Tool will display a green PASS circle. You may then disconnect your phone from the PC.
CONGRATULATIONS! You have successfully flashed your Haier 6190W to its factory defaults.
NOTE: if you encounter any errors while flashing your Haier 6190W using SP Flash Tools, see here: Solutions to All SP Flash Tools Errors: Practical Guides

For Graphical Illustrations on how to flash Haier android devices, see here: How to Flash Haier Android Device: Step by Step with Pictures

Also Read:

Video Tutorial: How to Flash All MTK Android Devices Including Haier 6190W


How to Hard Reset iTel 1508 (it1508)

Most iTel androids give nightmare when trying to put them in recovery mode making hard-resetting or formatting most iTel android devices difficult.


Because iTel androids are SpreadTRUM androids, they have slightly different methods compare to other android devices like HTC, Sansung, Tecno amongst others which have specific key combo for booting into recovery mode from which you can perform a hard reset, factory reset, wipe user data or clean format the iTel android, itel it1508 to be specific.


But the truth is, iTel android also have specific key combo for booting into recovery mode which is mostly needed whenever we need to factory reset or hard reset the phone.
Here, I would discuss how to put your iTel 1508 android device in recovery mode for factory reset, soft format or for enabling USB Debugging on the iTel android phone even when the pattern is locked or password restricted.


How to Boot iTel 1508 to Recovery Mode and Hard Reset or Wipe

1. Power Off your iTel 1508: either by removing the battery from the phone or by powering it off normally, the first thing you need to do is just power off the phone.


2. Press And Hold the Power Button for about 3 Seconds.


iTel 1508 Hard Reset -Step 2

NOTE: Some iTel androids such as the iTel it1502 volume button should be pressed for up to 15 seconds at this stage.

3. While Still Holding the Power Button, press and hold Volume Down (Volume -) Buttion for about 3 Seconds.


iTel 1508 Hard Reset -Step 3

I.E Now, you should be pressing both Volume Down + Power Buttons together.


4. Now, release both buttons i.e Power Button and Volume Down button at once.


iTel 1508 Hard Reset -Step 4

5. Shortly after releasing both buttons, an android icon shhould appear on your iTel 1508 screen. Now, press the Volume Up (Volume +) button.
Pronto! Your iTel 1508 should now boot into recovery mode.


iTel 1508 Hard Reset -Step 5

NOTE:

1. Use the Volume-up to navigate up.

2. Use the Volume-down to navigate down.

3. The Power button to select.

4. This methods have only been used for iTel it1508.

5. I believe the same method should work with all iTel android devices thus; for booting all of them to recovery mode.


How to Enable USB Debugging Mode In iTel Android While Screen is Locked

1. Follow the instructions detailed in the first section above on how to boot iTel it1508 to recovery mode and hard reset.


2. When you get to the stage 4 discussed above, swipe or pull your iTel it1508 screen from the top.


3. Navigate to Settings and tap it.


4. Scroll down until you see Developer Option and tap it.

5. If Developer Option is not there, go to About phone >> Build Number. Tap the Build Number repeatedly for up to 7 - 9 times. Or, until it says, "You are now a developer"


If you prefer to put your iTel android in USB Debugging mode while the screen is locked or password protected, the simple steps explained above is your safest and best guess.

Haier E451 Stock Firmware, Stock ROM Download

Haier Android Stock ROM Firmware Flash File
This Haier E451 Firmware, Stock ROM file can be used with any service tools capable of Flashing Stock ROM file on Haier Android devices.
Stock firmware are mostly needed to either upgrade your Haier E451, downgrade it or, to simply flash the phone to correct certain software issues or malfunctions on the phone. Here on this page I have contained the download link for the complete Haier E451, Stock ROM file which can be used to flash factory OS back to your Haier E451.

How to Download Stock Firmware and Flash Haier E451 with the Stock ROM

1. Download SP Flash Tool from here and install it on your PC. If you don't have MTK Android drivers installed on your PC yet, you must install it too. Download VCOM Drivers here

2. Download your Haier E451 firmware, Stock ROM File from here.

3. Open the SP Flash Tool you downloaded from the link above. It is compressed in a zip file, simply extract it onto a folder on your PC, open the folder to locate flash_tool.exe application and then; double-click it to lunch the program.

4. Go to the folder where you downloaded the Haier E451 Stock ROM and open it. It is compressed in a ZIP File, simply decompress/unzip it onto a folder on your PC.

5. On SP Flash Tool, select Scatter Loading. A window should open. Using the browse button, navigate to the folder where you unzipped the Haier E451 stock ROM and then select "MTXXXX-ANDROID-SCATTER", from there. Remember: "xxxx" refers to the MTK version of your phone.

6. Once selected, SP Flash Tool will load all the partitions in the Haier E451 stock ROM you downloaded. From the list, mark all the partitions EXCEPT these three (3): Preloader, UserData and CACHE.

7. Now, select Download on SP Flash Tool.

8. Put off your Haier E451 or remove battery from it and re-insert the battery again. Connect your Haier E451 Mobile Phone to the PC and then tap the Power button once.

9. For few seconds, your Windows PC will install the necessary drivers for the flashing operation and then, the flashing operation will commence promptly.

10. When the flashing operation completes, SP Flash Tool will display a green PASS circle. You may then disconnect your phone from the PC.
CONGRATULATIONS! You have successfully flashed your Haier E451 to its factory defaults.
NOTE: if you encounter any errors while flashing your Haier E451 using SP Flash Tools, see here: Solutions to All SP Flash Tools Errors: Practical Guides

For Graphical Illustrations on how to flash Haier android devices, see here: How to Flash Haier Android Device: Step by Step with Pictures

Also Read:

Video Tutorial: How to Flash All MTK Android Devices Including Haier E451


How to Hard Reset iTel 1409 Plus (it1409)

Most iTel androids give nightmare when trying to put them in recovery mode making hard-resetting or formatting most iTel android devices difficult.


Because iTel androids are SpreadTRUM androids, they have slightly different methods compare to other android devices like HTC, Sansung, Tecno amongst others which have specific key combo for booting into recovery mode from which you can perform a hard reset, factory reset, wipe user data or clean format the iTel android, itel it1409 to be specific.


But the truth is, iTel android also have specific key combo for booting into recovery mode which is mostly needed whenever we need to factory reset or hard reset the phone.
Here, I would discuss how to put your iTel 1409 Plus android device in recovery mode for factory reset, soft format or for enabling USB Debugging on the iTel android phone even when the pattern is locked or password restricted.


How to Boot iTel 1409 Plus to Recovery Mode and Hard Reset or Wipe

1. Power Off your iTel 1409 Plus: either by removing the battery from the phone or by powering it off normally, the first thing you need to do is just power off the phone.


2. Press And Hold the Power Button for about 3 Seconds.


iTel 1409 Plus Hard Reset -Step 2

NOTE: Some iTel androids such as the iTel it1502 volume button should be pressed for up to 15 seconds at this stage.

3. While Still Holding the Power Button, press and hold Volume Down (Volume -) Buttion for about 3 Seconds.


iTel 1409 Plus Hard Reset -Step 3

I.E Now, you should be pressing both Volume Down + Power Buttons together.


4. Now, release both buttons i.e Power Button and Volume Down button at once.


iTel 1409 Plus Hard Reset -Step 4

5. Shortly after releasing both buttons, an android icon shhould appear on your iTel 1409 Plus screen. Now, press the Volume Up (Volume +) button.
Pronto! Your iTel 1409 Plus should now boot into recovery mode.


iTel 1409 Plus Hard Reset -Step 5

NOTE:

1. Use the Volume-up to navigate up.

2. Use the Volume-down to navigate down.

3. The Power button to select.

4. This methods have only been used for iTel it1409.

5. I believe the same method should work with all iTel android devices thus; for booting all of them to recovery mode.


How to Enable USB Debugging Mode In iTel Android While Screen is Locked

1. Follow the instructions detailed in the first section above on how to boot iTel it1409 to recovery mode and hard reset.


2. When you get to the stage 4 discussed above, swipe or pull your iTel it1409 screen from the top.


3. Navigate to Settings and tap it.


4. Scroll down until you see Developer Option and tap it.

5. If Developer Option is not there, go to About phone >> Build Number. Tap the Build Number repeatedly for up to 7 - 9 times. Or, until it says, "You are now a developer"


If you prefer to put your iTel android in USB Debugging mode while the screen is locked or password protected, the simple steps explained above is your safest and best guess.

Haier G30 Stock Firmware, Stock ROM Download

Haier Android Stock ROM Firmware Flash File
This Haier G30 Firmware, Stock ROM file can be used with any service tools capable of Flashing Stock ROM file on Haier Android devices.
Stock firmware are mostly needed to either upgrade your Haier G30, downgrade it or, to simply flash the phone to correct certain software issues or malfunctions on the phone. Here on this page I have contained the download link for the complete Haier G30, Stock ROM file which can be used to flash factory OS back to your Haier G30.

How to Download Stock Firmware and Flash Haier G30 with the Stock ROM

1. Download SP Flash Tool from here and install it on your PC. If you don't have MTK Android drivers installed on your PC yet, you must install it too. Download VCOM Drivers here

2. Download your Haier G30 firmware, Stock ROM File from here.

3. Open the SP Flash Tool you downloaded from the link above. It is compressed in a zip file, simply extract it onto a folder on your PC, open the folder to locate flash_tool.exe application and then; double-click it to lunch the program.

4. Go to the folder where you downloaded the Haier G30 Stock ROM and open it. It is compressed in a ZIP File, simply decompress/unzip it onto a folder on your PC.

5. On SP Flash Tool, select Scatter Loading. A window should open. Using the browse button, navigate to the folder where you unzipped the Haier G30 stock ROM and then select "MTXXXX-ANDROID-SCATTER", from there. Remember: "xxxx" refers to the MTK version of your phone.

6. Once selected, SP Flash Tool will load all the partitions in the Haier G30 stock ROM you downloaded. From the list, mark all the partitions EXCEPT these three (3): Preloader, UserData and CACHE.

7. Now, select Download on SP Flash Tool.

8. Put off your Haier G30 or remove battery from it and re-insert the battery again. Connect your Haier G30 Mobile Phone to the PC and then tap the Power button once.

9. For few seconds, your Windows PC will install the necessary drivers for the flashing operation and then, the flashing operation will commence promptly.

10. When the flashing operation completes, SP Flash Tool will display a green PASS circle. You may then disconnect your phone from the PC.
CONGRATULATIONS! You have successfully flashed your Haier G30 to its factory defaults.
NOTE: if you encounter any errors while flashing your Haier G30 using SP Flash Tools, see here: Solutions to All SP Flash Tools Errors: Practical Guides

For Graphical Illustrations on how to flash Haier android devices, see here: How to Flash Haier Android Device: Step by Step with Pictures

Also Read:

Video Tutorial: How to Flash All MTK Android Devices Including Haier G30


How to Hard Reset iTel 1516 Plus (it1516+)

Most iTel androids give nightmare when trying to put them in recovery mode making hard-resetting or formatting most iTel android devices difficult.


Because iTel androids are SpreadTRUM androids, they have slightly different methods compare to other android devices like HTC, Sansung, Tecno amongst others which have specific key combo for booting into recovery mode from which you can perform a hard reset, factory reset, wipe user data or clean format the iTel android, itel it1516+ to be specific.


But the truth is, iTel android also have specific key combo for booting into recovery mode which is mostly needed whenever we need to factory reset or hard reset the phone.
Here, I would discuss how to put your iTel 1516 Plus android device in recovery mode for factory reset, soft format or for enabling USB Debugging on the iTel android phone even when the pattern is locked or password restricted.


How to Boot iTel 1516 Plus to Recovery Mode and Hard Reset or Wipe

1. Power Off your iTel 1516 Plus: either by removing the battery from the phone or by powering it off normally, the first thing you need to do is just power off the phone.


2. Press And Hold the Power Button for about 3 Seconds.


iTel 1516 Plus Hard Reset -Step 2

NOTE: Some iTel androids such as the iTel it1502 volume button should be pressed for up to 15 seconds at this stage.

3. While Still Holding the Power Button, press and hold Volume Down (Volume -) Buttion for about 3 Seconds.


iTel 1516 Plus Hard Reset -Step 3

I.E Now, you should be pressing both Volume Down + Power Buttons together.


4. Now, release both buttons i.e Power Button and Volume Down button at once.


iTel 1516 Plus Hard Reset -Step 4

5. Shortly after releasing both buttons, an android icon shhould appear on your iTel 1516 Plus screen. Now, press the Volume Up (Volume +) button.
Pronto! Your iTel 1516 Plus should now boot into recovery mode.


iTel 1516 Plus Hard Reset -Step 5

NOTE:

1. Use the Volume-up to navigate up.

2. Use the Volume-down to navigate down.

3. The Power button to select.

4. This methods have only been used for iTel it1516+.

5. I believe the same method should work with all iTel android devices thus; for booting all of them to recovery mode.


How to Enable USB Debugging Mode In iTel Android While Screen is Locked

1. Follow the instructions detailed in the first section above on how to boot iTel it1516+ to recovery mode and hard reset.


2. When you get to the stage 4 discussed above, swipe or pull your iTel it1516+ screen from the top.


3. Navigate to Settings and tap it.


4. Scroll down until you see Developer Option and tap it.

5. If Developer Option is not there, go to About phone >> Build Number. Tap the Build Number repeatedly for up to 7 - 9 times. Or, until it says, "You are now a developer"


If you prefer to put your iTel android in USB Debugging mode while the screen is locked or password protected, the simple steps explained above is your safest and best guess.

Haier G51 Stock Firmware, Stock ROM Download

Haier Android Stock ROM Firmware Flash File
This Haier G51_V002_6408DDR3_151118_2100 Firmware, Stock ROM file can be used with any service tools capable of Flashing Stock ROM file on Haier Android devices.
Stock firmware are mostly needed to either upgrade your Haier G51, downgrade it or, to simply flash the phone to correct certain software issues or malfunctions on the phone. Here on this page I have contained the download link for the complete Haier G51, Stock ROM file which can be used to flash factory OS back to your Haier G51.

How to Download Stock Firmware and Flash Haier G51 with the Stock ROM

1. Download SP Flash Tool from here and install it on your PC. If you don't have MTK Android drivers installed on your PC yet, you must install it too. Download VCOM Drivers here

2. Download your Haier G51 firmware, Stock ROM File from here.

3. Open the SP Flash Tool you downloaded from the link above. It is compressed in a zip file, simply extract it onto a folder on your PC, open the folder to locate flash_tool.exe application and then; double-click it to lunch the program.

4. Go to the folder where you downloaded the Haier G51 Stock ROM and open it. It is compressed in a ZIP File, simply decompress/unzip it onto a folder on your PC.

5. On SP Flash Tool, select Scatter Loading. A window should open. Using the browse button, navigate to the folder where you unzipped the Haier G51 stock ROM and then select "MTXXXX-ANDROID-SCATTER", from there. Remember: "xxxx" refers to the MTK version of your phone.

6. Once selected, SP Flash Tool will load all the partitions in the Haier G51 stock ROM you downloaded. From the list, mark all the partitions EXCEPT these three (3): Preloader, UserData and CACHE.

7. Now, select Download on SP Flash Tool.

8. Put off your Haier G51 or remove battery from it and re-insert the battery again. Connect your Haier G51 Mobile Phone to the PC and then tap the Power button once.

9. For few seconds, your Windows PC will install the necessary drivers for the flashing operation and then, the flashing operation will commence promptly.

10. When the flashing operation completes, SP Flash Tool will display a green PASS circle. You may then disconnect your phone from the PC.
CONGRATULATIONS! You have successfully flashed your Haier G51 to its factory defaults.
NOTE: if you encounter any errors while flashing your Haier G51 using SP Flash Tools, see here: Solutions to All SP Flash Tools Errors: Practical Guides

For Graphical Illustrations on how to flash Haier android devices, see here: How to Flash Haier Android Device: Step by Step with Pictures

Also Read:

Video Tutorial: How to Flash All MTK Android Devices Including Haier G51


How to Hard Reset iTel 1520 (it1520)

Most iTel androids give nightmare when trying to put them in recovery mode making hard-resetting or formatting most iTel android devices difficult.


Because iTel androids are SpreadTRUM androids, they have slightly different methods compare to other android devices like HTC, Sansung, Tecno amongst others which have specific key combo for booting into recovery mode from which you can perform a hard reset, factory reset, wipe user data or clean format the iTel android, itel it1520 to be specific.


But the truth is, iTel android also have specific key combo for booting into recovery mode which is mostly needed whenever we need to factory reset or hard reset the phone.
Here, I would discuss how to put your iTel 1520 android device in recovery mode for factory reset, soft format or for enabling USB Debugging on the iTel android phone even when the pattern is locked or password restricted.


How to Boot iTel 1520 to Recovery Mode and Hard Reset or Wipe

1. Power Off your iTel 1520: either by removing the battery from the phone or by powering it off normally, the first thing you need to do is just power off the phone.


2. Press And Hold the Power Button for about 3 Seconds.


iTel 1520 Hard Reset -Step 2

NOTE: Some iTel androids such as the iTel it1502 volume button should be pressed for up to 15 seconds at this stage.

3. While Still Holding the Power Button, press and hold Volume Down (Volume -) Buttion for about 3 Seconds.


iTel 1520 Hard Reset -Step 3

I.E Now, you should be pressing both Volume Down + Power Buttons together.


4. Now, release both buttons i.e Power Button and Volume Down button at once.


iTel 1520 Hard Reset -Step 4

5. Shortly after releasing both buttons, an android icon shhould appear on your iTel 1520 screen. Now, press the Volume Up (Volume +) button.
Pronto! Your iTel 1520 should now boot into recovery mode.


iTel 1520 Hard Reset -Step 5

NOTE:

1. Use the Volume-up to navigate up.

2. Use the Volume-down to navigate down.

3. The Power button to select.

4. This methods have only been used for iTel it1520.

5. I believe the same method should work with all iTel android devices thus; for booting all of them to recovery mode.


How to Enable USB Debugging Mode In iTel Android While Screen is Locked

1. Follow the instructions detailed in the first section above on how to boot iTel it1520 to recovery mode and hard reset.


2. When you get to the stage 4 discussed above, swipe or pull your iTel it1520 screen from the top.


3. Navigate to Settings and tap it.


4. Scroll down until you see Developer Option and tap it.

5. If Developer Option is not there, go to About phone >> Build Number. Tap the Build Number repeatedly for up to 7 - 9 times. Or, until it says, "You are now a developer"


If you prefer to put your iTel android in USB Debugging mode while the screen is locked or password protected, the simple steps explained above is your safest and best guess.

Haier HL-Y500 Stock Firmware, Stock ROM Download

Haier Android Stock ROM Firmware Flash File
This Haier HL-Y500 Firmware, Stock ROM file can be used with any service tools capable of Flashing Stock ROM file on Haier Android devices.
Stock firmware are mostly needed to either upgrade your Haier HL-Y500, downgrade it or, to simply flash the phone to correct certain software issues or malfunctions on the phone. Here on this page I have contained the download link for the complete Haier HL-Y500, Stock ROM file which can be used to flash factory OS back to your Haier HL-Y500.

How to Download Stock Firmware and Flash Haier HL-Y500 with the Stock ROM

1. Download SP Flash Tool from here and install it on your PC. If you don't have MTK Android drivers installed on your PC yet, you must install it too. Download VCOM Drivers here

2. Download your Haier HL-Y500 firmware, Stock ROM File from here.

3. Open the SP Flash Tool you downloaded from the link above. It is compressed in a zip file, simply extract it onto a folder on your PC, open the folder to locate flash_tool.exe application and then; double-click it to lunch the program.

4. Go to the folder where you downloaded the Haier HL-Y500 Stock ROM and open it. It is compressed in a ZIP File, simply decompress/unzip it onto a folder on your PC.

5. On SP Flash Tool, select Scatter Loading. A window should open. Using the browse button, navigate to the folder where you unzipped the Haier HL-Y500 stock ROM and then select "MTXXXX-ANDROID-SCATTER", from there. Remember: "xxxx" refers to the MTK version of your phone.

6. Once selected, SP Flash Tool will load all the partitions in the Haier HL-Y500 stock ROM you downloaded. From the list, mark all the partitions EXCEPT these three (3): Preloader, UserData and CACHE.

7. Now, select Download on SP Flash Tool.

8. Put off your Haier HL-Y500 or remove battery from it and re-insert the battery again. Connect your Haier HL-Y500 Mobile Phone to the PC and then tap the Power button once.

9. For few seconds, your Windows PC will install the necessary drivers for the flashing operation and then, the flashing operation will commence promptly.

10. When the flashing operation completes, SP Flash Tool will display a green PASS circle. You may then disconnect your phone from the PC.
CONGRATULATIONS! You have successfully flashed your Haier HL-Y500 to its factory defaults.
NOTE: if you encounter any errors while flashing your Haier HL-Y500 using SP Flash Tools, see here: Solutions to All SP Flash Tools Errors: Practical Guides

For Graphical Illustrations on how to flash Haier android devices, see here: How to Flash Haier Android Device: Step by Step with Pictures

Also Read:

Video Tutorial: How to Flash All MTK Android Devices Including Haier HL-Y500


How to Hard Reset iTel 1516 Plus (it1516+)

Most iTel androids give nightmare when trying to put them in recovery mode making hard-resetting or formatting most iTel android devices difficult.


Because iTel androids are SpreadTRUM androids, they have slightly different methods compare to other android devices like HTC, Sansung, Tecno amongst others which have specific key combo for booting into recovery mode from which you can perform a hard reset, factory reset, wipe user data or clean format the iTel android, itel it1516+ to be specific.


But the truth is, iTel android also have specific key combo for booting into recovery mode which is mostly needed whenever we need to factory reset or hard reset the phone.
Here, I would discuss how to put your iTel 1516 Plus android device in recovery mode for factory reset, soft format or for enabling USB Debugging on the iTel android phone even when the pattern is locked or password restricted.


How to Boot iTel 1516 Plus to Recovery Mode and Hard Reset or Wipe

1. Power Off your iTel 1516 Plus: either by removing the battery from the phone or by powering it off normally, the first thing you need to do is just power off the phone.


2. Press And Hold the Power Button for about 3 Seconds.


iTel 1516 Plus Hard Reset -Step 2

NOTE: Some iTel androids such as the iTel it1502 volume button should be pressed for up to 15 seconds at this stage.

3. While Still Holding the Power Button, press and hold Volume Down (Volume -) Buttion for about 3 Seconds.


iTel 1516 Plus Hard Reset -Step 3

I.E Now, you should be pressing both Volume Down + Power Buttons together.


4. Now, release both buttons i.e Power Button and Volume Down button at once.


iTel 1516 Plus Hard Reset -Step 4

5. Shortly after releasing both buttons, an android icon shhould appear on your iTel 1516 Plus screen. Now, press the Volume Up (Volume +) button.
Pronto! Your iTel 1516 Plus should now boot into recovery mode.


iTel 1516 Plus Hard Reset -Step 5

NOTE:

1. Use the Volume-up to navigate up.

2. Use the Volume-down to navigate down.

3. The Power button to select.

4. This methods have only been used for iTel it1516+.

5. I believe the same method should work with all iTel android devices thus; for booting all of them to recovery mode.


How to Enable USB Debugging Mode In iTel Android While Screen is Locked

1. Follow the instructions detailed in the first section above on how to boot iTel it1516+ to recovery mode and hard reset.


2. When you get to the stage 4 discussed above, swipe or pull your iTel it1516+ screen from the top.


3. Navigate to Settings and tap it.


4. Scroll down until you see Developer Option and tap it.

5. If Developer Option is not there, go to About phone >> Build Number. Tap the Build Number repeatedly for up to 7 - 9 times. Or, until it says, "You are now a developer"


If you prefer to put your iTel android in USB Debugging mode while the screen is locked or password protected, the simple steps explained above is your safest and best guess.